This tutorial will show you how to use the powerful Layer Styles’ capabilities in Photoshop, along with a couple of brushes and filters to create some delicious-looking bagels.
This was suggested by Luca. Thank you for the great suggestion, Luca : )
The Final Result

- Software Used : Photoshop
- Version : CS6 Extended
- Time : 1:15 – 2:30
- Franks font.
- Floral Patterns by sofi01.
- Wood Patterns pattern by Loungedy.
- Paper_2 by Atle Mo.
- White Texture by Dmitry.
- Concrete wall by Atle Mo.
Create a new 1250 x 1250 px document (you can use any Width value you like, but make sure that the Height value is not less than 1250).
Pick the Rectangle Tool, Set the Foreground color to
#d4d0c9, and draw a rectangle that extends a little bit outside the document.
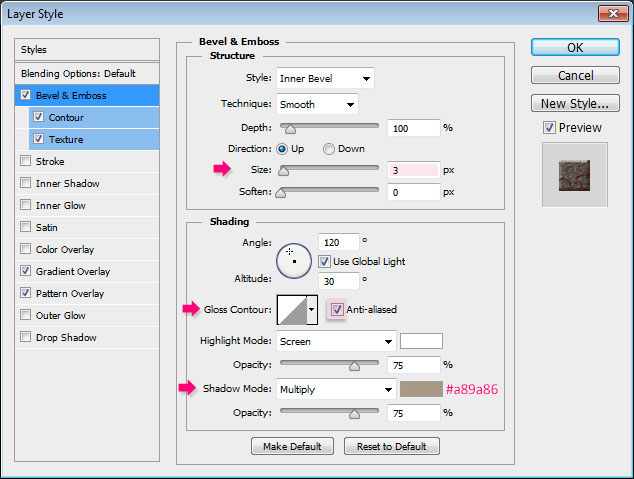
- Bevel and Emboss
- Size : 3
- Check the Anti-aliased box
- Shadow Mode – Color :
#a89a86
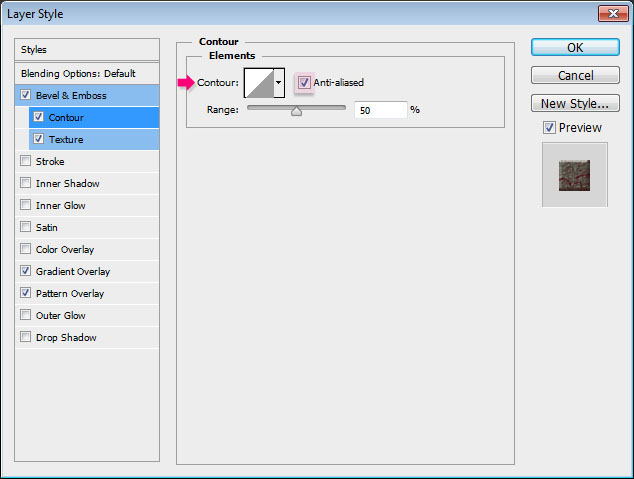
- Check the Anti-aliased box.
- Pattern : paper_2
- Depth : 318%

- Blend Mode : Multiply
- Style : Radial
- Scale : 150%
- Click the Gradient box to create the gradient.

This gradient is created using two colors
#ffffff to the left, with the Opacity 0%, and #6e3c32 to the right, with the Opacity 100%. 
- Blend Mode : Multiply
- Pattern : 1181556893.gif


Set the Foreground color to
#d8d1b9, pick the Ellipse Tool, then press and hold the Shift key, and click and drag to create a circle that fits within the document. 
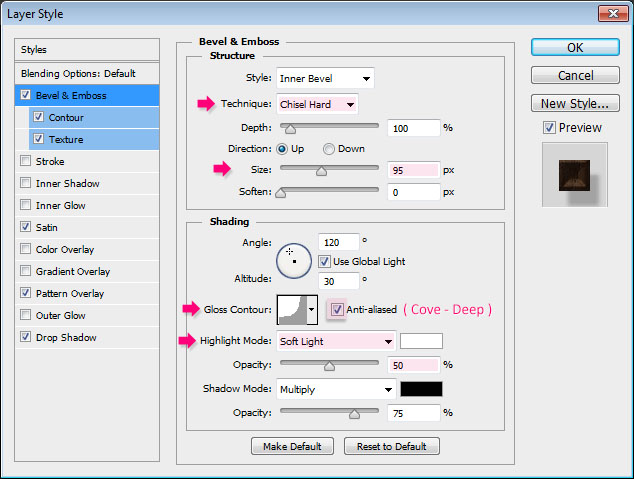
– Bevel and Emboss
- Technique : Chisel Hard
- Size : 95
- Gloss Contour : Cove – Deep
- Check the Anti-aliased box
- Highlight Mode : Soft Light
- Opacity : 50%
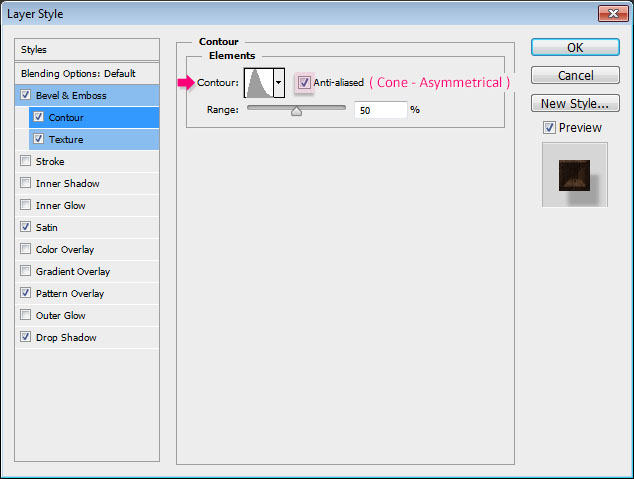
- Contour : Cone – Asymmetrical
- Check the Anti-aliased box.
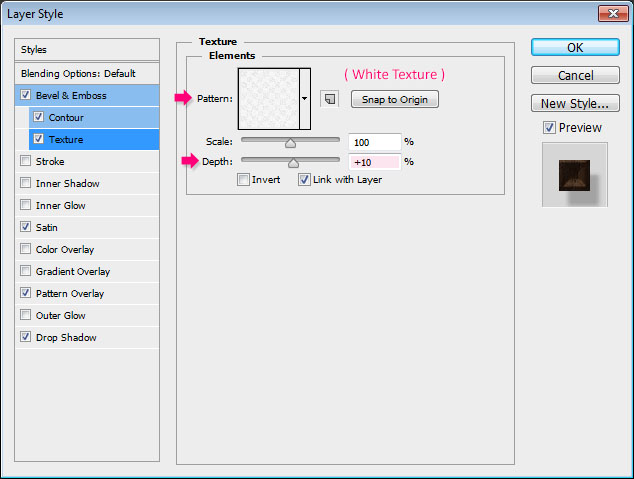
- Pattern : White Texture
- Depth : 10%
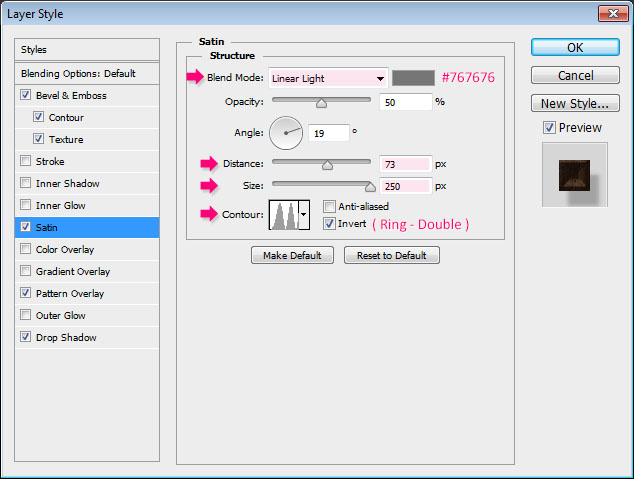
- Blend Mode : Linear Light
- Color :
#767676 - Distance : 73
- Size : 250
- Contour : Ring – Double
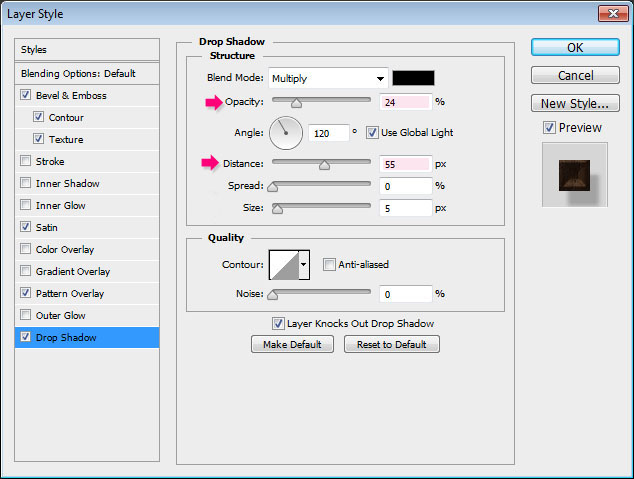
- Blend Mode : Multiply
- Pattern : Wood 411.jpeg

- Opacity : 24%
- Distance : 55

Create the first letter of the word you want to create in All Caps, using the font Franks, the color
#e3d1ab, and the font Size 570.You can work simultaneously on all the letters, or work on each one separately. That’s totally up to you.

To do so, right click the text layer, then choose Convert to Shape.


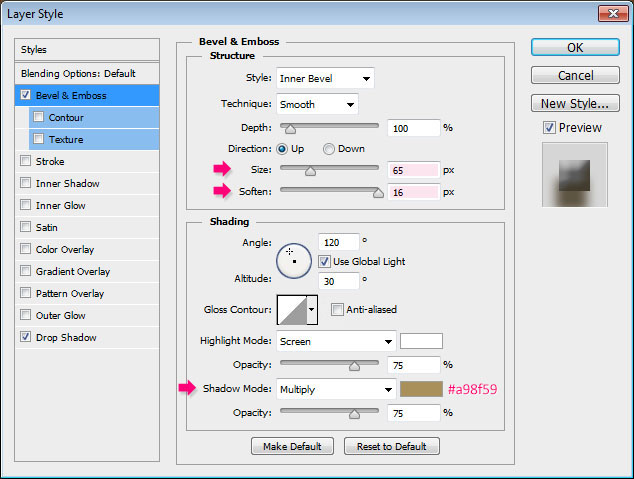
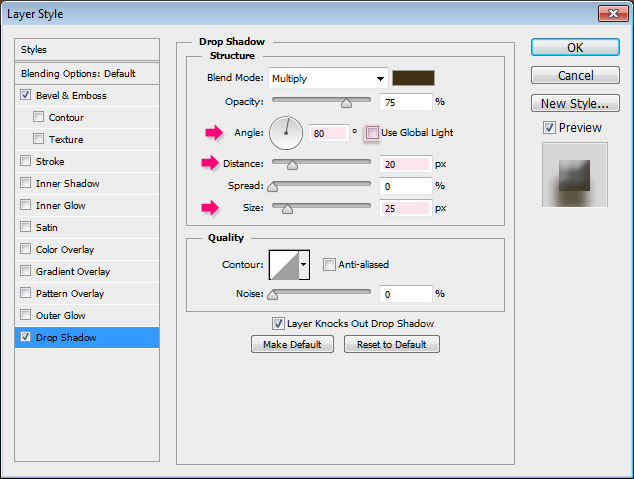
Double click the original text layer to apply the following Layer Style:
– Bevel and Emboss
- Size : 65
- Soften : 16
- Shadow Mode – Color :
#a98f59
- Uncheck the Use Global Light box
- Angle : 80
- Distance : 20
- Size : 25

Double click the copy text layer to apply the following Layer Style:
– Inner Shadow
- Color :
#533416 - Distance : 0
- Size : 7

- Blend Mode : Multiply
- Opacity : 85%
- Fill : Choose the gradient fill – we’ll create the gradient in a minute.
- Technique : Precise
- Source : Center
- Size : 43
- Contour : Gaussian
- Range : 80

The three colors used and their Locations are:
# – Color – Location
- 1 –
#d17a34– 0% - 2 –
#ecd8ad– 45% - 3 –
#e0c09a– 88%
# – Opacity – Location
- 1 – 100% – 0
- 2 – 100% – 45%
- 3 – 0% – 100%


Double click the copy 2 text layer to apply the following Layer Style:
– Bevel and Emboss
- Size : 62
- Uncheck the Use Global Light box
- Angle : 68
- Altitude : 64
- Gloss Contour : Half Round
- Check the Anti-aliased box
- Highlight Mode
- Color :
#ffe4bd - Opacity : 25%
- Shadow Mode – Opacity : 0%
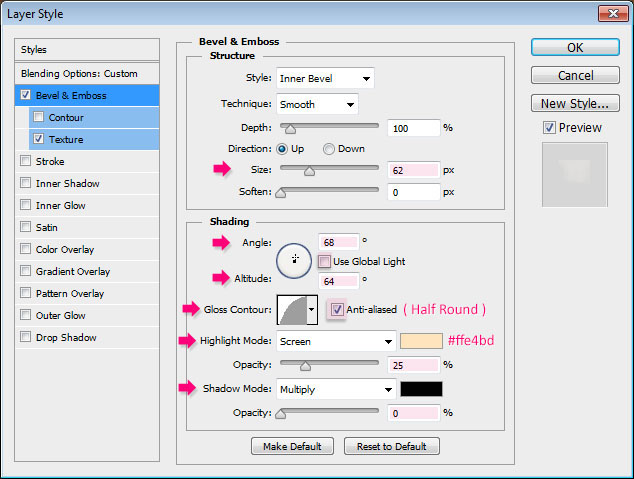
- Pattern : White Texture


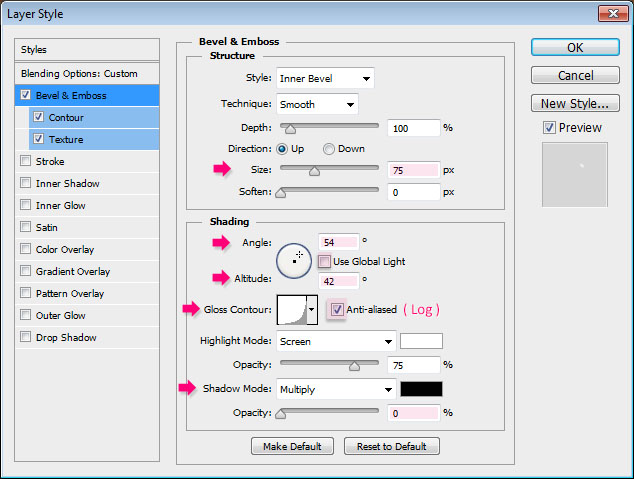
Double click the copy 3 text layer to apply the following Layer Style:
– Bevel and Emboss
- Size : 75
- Uncheck the Use Global Light box
- Angle : 54
- Altitude : 42
- Gloss Contour : Log
- Check the Anti-aliased box
- Shadow Mode – Opacity : 0%
- Contour : Half Round
- Check the Anti-aliased box.
- Range : 40%
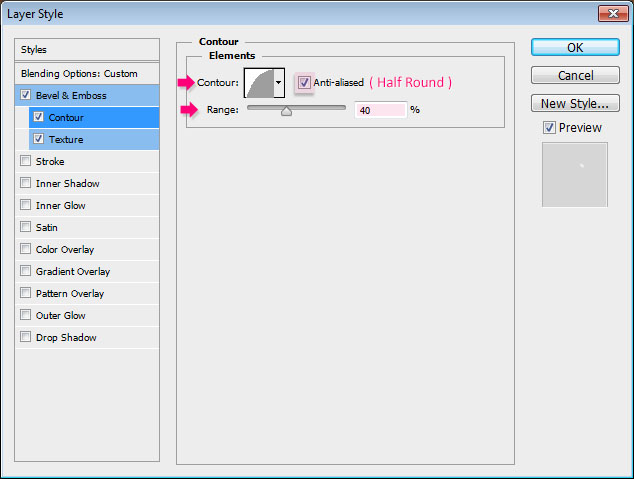
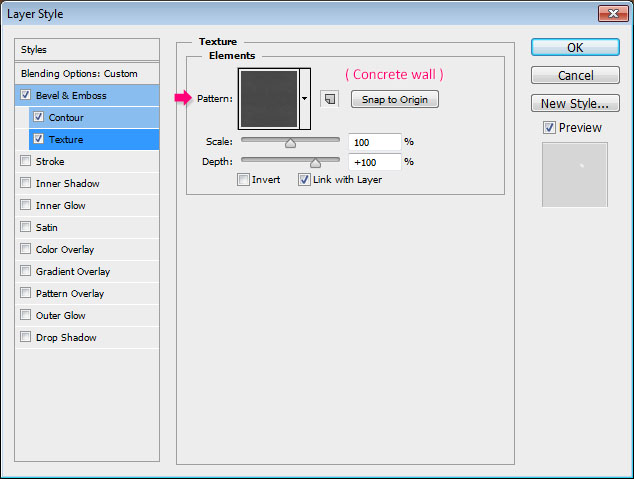
- Pattern : Concrete wall

Ctrl/Cmd + click any letter layer’s thumbnail to create a selection.


#994b0d, pick the Paint Bucket Tool, create a new layer on top of all layers, call it Brown, and fill the selection with the Foreground color.
Ctrl/Cmd + click any letter layer’s thumbnail to create a selection one more time. Create another new layer and call it Texture. Set the Foreground color to
#e4c8a0 and the Background color to #936d2f.We’ll apply some filters to create a simple texture that will also enhance the coloring of the letter.


Pick the Brush Tool, and open the Brush panel (Window > Brush).
Choose a soft round brush, and modify its Settings as shown below:
Brush Tip Shape


#cac2b7.

Create a new layer, call it Inner Shadow, and change its Blend Mode to Multiply. Set the Foreground color to
#e7cf93 and reduce the Brush Size to 45 px.


#e3b96d, and increase the Brush Size to 175 px.Click and drag a little bit far from (outside) the selection, and around the letter, to darken the edges.

This is the main bagel. The next steps are simple additions to this outcome.

Pick the Brush Tool and open the Brush panel. Choose a hard round brush, and modify its Settings as below:
Brush Tip Shape


Step 13
Create a new layer on top of all layers and call it Sesame.

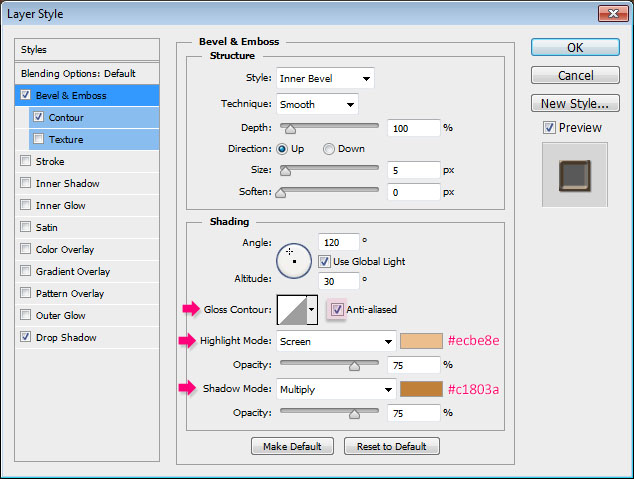
– Bevel and Emboss
- Check the Anti-aliased box
- Highlight Mode – Color :
#ecbe8e - Shadow Mode : – Color :
#c1803a
- Contour : Cone
- Check the Anti-aliased box.
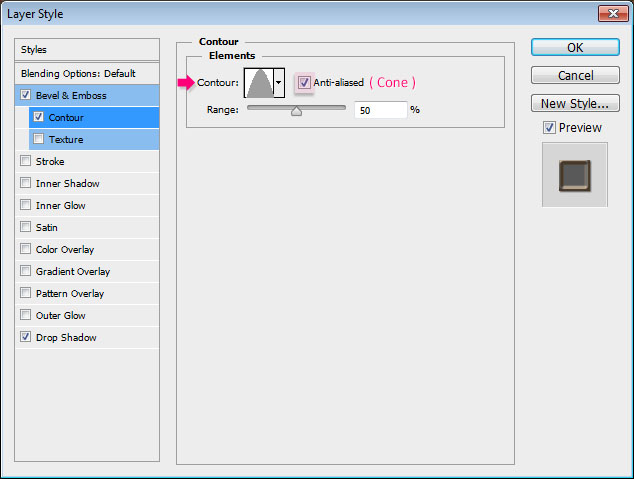
- Opacity : 60%
- Distance : 1
- Size : 2


Black.
#d4ad6c, select the Sesame layer, then click and drag over the middle part of the bagel letter to scatter the sesame. A helpful tip would be to drag in a subtle zig-zag motion. this will help better spread the seeds much better.

#372f2d, decrease the brush Size to 7, select the Poppy Seed layer, then click and drag to add the poppy seeds to the bagel.
The bagel letter is finished now. So group its layers, then go ahead and create the other letters.
When done, select each group, then go to Edit > Free Transform, to rotate and position the letters inside the bowl.


# – Color – Location
- 1 – #7b2800 – 0%
- 2 – #ffb211 – 60%
- 3 – #ffffc7 – 100%


Hope you enjoyed the tutorial and found it delicious
